

Makeup helps us to enhance the existing features of our face by giving it more depth and definition. The meaning of makeup can differ from person to person. While for a few just a stroke of black eyeliner on the upper lash line may count as makeup, whereas for others highlighting every element of their face is makeup. Eyes tend to be one of the most prominent features of the whole face. Just enhancing them can change the complete outlook of a person. However, working around with eyeshadows can intimidate a lot of makeup beginners. While some find it as easy as ABC, others find a hard time nailing the art of blending and mixing colours to highlight their brow bone or upper eyelid. If you are one of those, utilise this lockdown duration to become a pro at doing ravishing eye makeup. All you need to do is follow these simple steps.

Things You Will Need
- Cleanser
- Hand towel/ tissue paper
- Moisturiser
- Foundation/ primer
- Makeup brushes
- Concealer
- Kohl pencil
- Eye shadow pallet
- False lashes
- Eyeliner
- Mascara
Week 01: Natural Eye Make-Up

For natural day-to-day eye look, one needs to work with shades close to their skin tone. The trick is to start simple with a few neutral shadows subtly applied. If you find it tricky, don’t worry because, we scoured the best natural eye makeup tutorials out there, so you can master the art of daytime eyeshadow.
Day 01: Identify Your Shade
Since we are working with the existing eye shadow pallet, it is not necessary that you will find your nude shade in there. Also, if you do have a neutral pallet, it is a must that you understand what will suit you the best.
Steps
- Stand in front of the mirror, begin by putting one dot of every eyeshadow shade you think is close to your skin tone on the eyelid. The closest shade is your nude colour.
- Now, clean your eyelid using tissue paper and apply your nude shade all over to see if it is matching completely.
- If you can’t find your colour, mix two shades to create one perfect colour.
- If you have dark skin, mix a little bit of maroon lipstick with light brown. For medium tone, mix red lipstick with light brown shade and for lighter skin tone add yellow eye shadow to brown.
Day 02: Eye Contouring

When doing natural eye makeup, contouring is important because we are trying to enhance our natural eye shape. Never miss this step as different eye shapes such as downturned, monolid, or small eyes, needs distinct types of contouring.
Downturned eyes resemble much like a shape of an almond, with a downward tilt at the outer corners. And, monolid are the eyes that do not have a crease on the eyelid. Most likely people from the eastern side tend to have monolids.
Steps
- Take a hue darker to your nude shade and apply it to an area that defines the shape of your eyes.
- If you have downturned eye focus on accentuating the corners. Women with monolid eyes must focus on contouring the centre of the eyes. And the one with a small eye, your goal should be to uplift the outer crease.
Day 03: Blending
No one wants their eyes to look like a child's art project gone wrong. Without perfecting the art of blending, the eye shadows could end up looking muddy, splotchy, patchy, or harsh.
Steps
- You will need a smudge brush, but if you don’t have it work with any brush that has densely packed bristles.
- Remember your contouring lessons and apply the lightest shade close to your skin tone on the inner half of lids.
- Now add a slightly darker shade of the same hue as you move toward the outer corners.
- Take another clean brushwork in a windshield-wiper-like motion. All you want to do is soften the edges and diffuse the hue.
Day 04: Experiment With More Shades
Now that you have learned your basics, its time you go bold with your actions.
Steps
- Other than simple browns and pink, there are other neutral shades that you should experiment with.
- Practice working with peach rose, bronze and even plum to carry the different looks on different outfits.
Day 05: Prep And Prime
Now that you know all that you need to create a perfect natural eye look. It’s time that you learn how to make it last all day long. Primer helps by softening the skin, sealing the pores, and preparing the skin for the makeup application.
Steps
- Choose the right shade of primer or foundation, and apply it on the eyelid.
- Using a fluffy brush, apply a white or light yellow creamy eyeshadow over the primer or foundation and blend.
Day 06: Practice Full Eye Make-Up
Now that you have learned everything, it is time that you try on bringing the complete look together.
Steps
- You will start by prepping your eyes so firstly you need to prime the upper eyelid. Follow day 5 steps.
- Next, start contouring, as it will help give your eyes the right enhancement it needs. Follow day 2 steps.
- Apply the eye shadows and blend. Same as instructed to do on day 3. Don’t try to play safe, experiment with more and more shades as suggested earlier for day 4.
- You can skip using eyeliner, but do not forget to apply two coats of mascara.
Day07: Try With Full Face Makeup

As you can’t step out by only applying eye makeup, it’s imperative that you try the complete eye makeup along with face makeup.
Steps
- Experiment which shade of blush, lipstick or highlighters goes well with the look you created on the eyes.
- Click a few snaps in different lighting without any filters to analyse if the look suits your face.
Week 02: Smokey Eyes

Smokey eyes can feel a bit trickier than the other looks. Therefore, we’re going to break down the ins and outs of this makeup. The key is to blend nicely and not turn everything black. We will be practicing two smokey eye looks, one for the day and another for the night.
Day Time Smokey Eye Makeup
Day 08: Create Base
A proper base helps in controlling the saturation of the finished look. The step is just like sketching before the painting. Also, it keeps the powder shadows in place.
Steps
- Start with neutral shades that you used to create a natural eye look.
- You want to create a base that has no sharp edges, but plane slate to fill in the colours.
- Once you apply nudes, just blend and blend until the upper lid becomes smooth.
Day 09: Identify The Shades
Smokey eyes don’t only mean playing with black colour all over. There are other colours that help to create a smudgy look, especially when it comes to a daytime look.
Steps
- Identify two shades that mix well with each other, such as brown and light orange counts as good shades for daytime smokey eye look.
- A few other combinations are black and brown, bronze and orange, bronze and brown, etc. You can always experiment with more shades.
Day 10: Blending
As discussed earlier, the key to perfect smokey eye makeup is blending. So, master this art by following these steps:
Steps
- Take a fluffy brush, dip in the lighter shade. Start by working from the inner corner of your eyes.
- Work your brush in circles. Now dip the same brush in the darker shade and from the outer corner start applying the shadow.
- Take another clean brush and work in a windshield-wiper-like motion. All you want to do is soften the edges and diffuse the hue.
Night Smokey eye makeup
Day 11: Use Kohl As Base

Nothing can beat a smokey eye makeup created using kohl. It looks glamorous if done right.
Steps
- It’s imperative that you moisturise your upper lids and use a primer. This will help to make the makeup last.
- Take any kohl pencil line your upper and lower lids with it.
- Using a brush smudge kohl carefully over the entire upper lid till the crease. Work from the outer edge towards the inner corner.
Day 12: Lining The Lash Line
This step will give definition to your eyes. You can do this step by using black eye shadow or with any kohl pencil.
Steps
- Take an angled brush and smear black eye shadow/ kohl on the lower lid in order to cover the lower lash line.
- Line your eyes once again with the kohl for a better-defined look.
- If you want a winged smokey eye, stick a piece of tape on the outer corner before starting this step.
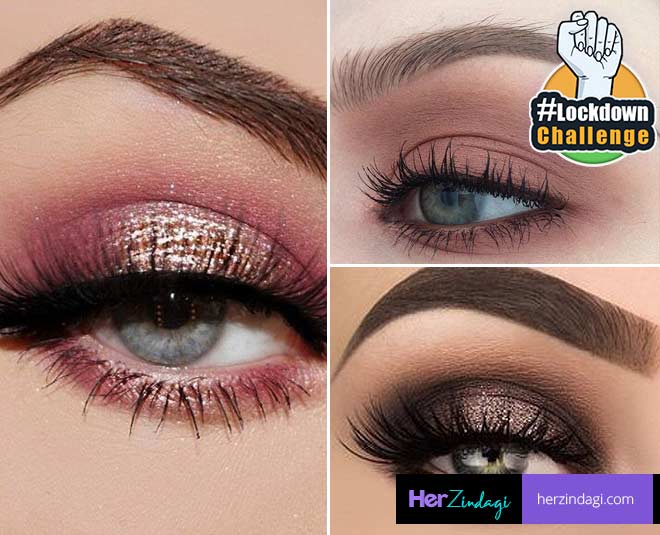
Day 13: Apply Glitter
During the night, your eyes put not just fade away in low lighting. In order to make it pop out a hint of glitter sounds like a great option.
Steps
- It's best to use cream-based glitter shadow as it remains on the place. If you don’t want to use glitter, you can also highlight using metallic, silver or gold shadow.
- All you need to do is use a finger to take a dot of the glitter shadow and place it on the centre of your upper eyelid.
- Using the same finger, lightly dab a bit kore and you’re done. Don’t blend.
Day 14: Practice Sliding From Day To Night Smokey Eye Look

What is the point of makeup when you can’t have fun wearing it? When it comes to smokey eyes, sliding from the day to the evening look is not a very tough task, here’s what you need to do.
Steps
- Take any kohl pencil, create small dots on your upper and lower lids.
- Using a brush or finger gently smudge kohl close to the lash lines. Work from the outer edge towards the inner corner.
- Line your eyes with the kohl for a better-defined look and you’re done.
Week 03: Party Eye Makeup
Party makeups need not be time-consuming if you know what and how much to do. The proper tutorial will help you make heads turns at the party, that too right time.
Day 15: Identify Right Colours
While there are no rules on choosing the shades when it comes to party look, you must identify the colours that suit your skin tone the best, at least for the base. As you can mix it along with any other colour whenever you want to experiment.
Steps
- There are different shades that go with fair, medium and darker skin tone when doing party look, but use only matte eyeshadow.
- If you have a fair skin tone, use shades close to white such as silver or metallic. Medium skin tones must use simple bronze shade as the base and the darker skin tone girls can use darker browns and bronze shades.
Day 16: Create The Party Look

Steps
- Apply your matte shade in windscreen wiper motions. Start working from the crease and cover the entire area.
- Find a shade that is likely to compliment your base shade. Now, use your finger to lightly dab another shadow across your lid.
- Use a different brush and blend the colours well.
Day 17: Learn Using Glitters
There is no party without sparkle and glitter, after all, you want to stand out!
Steps
- Use cream-based glitter shadow. If you don’t want to use glitter, you can also highlight the lid using metallic, silver or gold shadow.
- All you need to do is use your finger, take a dot of the glitter shadow and place it on centre of your upper lid.
- Using the finger again, slightly dab little more and you’re done.
Day 18: False Lashes
Party makeup can never look complete without some dramatic beautiful eyelashes. It is a must to learn this art properly without actually smudging your eye makeup.
Steps
- Measure the false lash against your actual eyelid and trim off the excess.
- Don't just glob the glue and rush to stick it to your eyelid, wait and let that glue dry a little.
- Place a mirror under your face, as you look down, place the lash strip on the lash line.
- Practice the step well, it may take an hour or two in the beginning but you will learn by practicing.
Day 19: Eye Liner And Mascara
Hope you have learned how to stick false lashes on your eyelid, now you need to learn how to make your strip lashes look less obviously like you're wearing strip lashes.
Steps
- Take liquid liner and draw a fine line starting from the wing and all the way to the inner corner of your eye.
- Apply the second line if you want to go dark and bold.
- You want to stick false lashes to your mascara, apply two thick coats of waterproof mascara for this.
Day 20: Practice full eye make-up

Now that you have learned the basics, it time that you try on the complete look by following all the steps.
Steps
- Start by prepping your eyes, so firstly you need to prime your upper eyelids. Follow the steps described on day 5 from the natural makeup look.
- Next, start contouring, as it will help give your eyes the right enhancement. Follow day 2 steps from the natural makeup look.
- Apply the eye shadows and blend. Same as instructed to do on day 16. Next, follow day 17 step, apply glitter shadow.
- Now, it’s time for false lashes. Conceal it edges using eyeliner and mascara.
Day 21: Try the look along with full face makeup
As you can’t step out by just doing your eye makeup, it’s imperative that you try the complete eye makeup along with face makeup.
Steps
- Try using different shades blush, lipstick and highlighters. This will help you analyse what will let your eyes be the centre of attraction.
- The key is to keep other features neutral and let your eye makeup do it talking.
- Click a few snaps in different lighting, especially yellow to see and find out how it’s looking on your face. Do not use filters.
- If you are satisfied, click more pictures, if not try blending the shadows well.
All these makeup looks are extremely used to learn and achieve. However, only by regular practice, you will be able to become a pro. Do you also envy those social media influencers, who sport amazing looks? This is your time to learn a new skill too. While you invest so much in buying and going to makeup artists to make heads turn at parties, with the help of this tutorial by the end of three weeks you will be a hands-on makeup guru with creating some stunning eye makeup looks, right in time to flaunt those at the office.