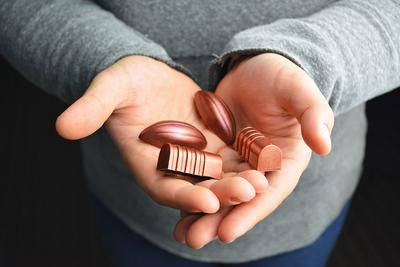
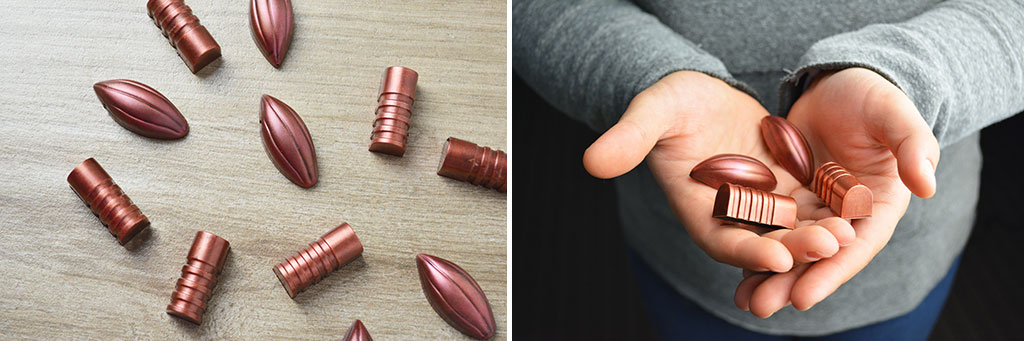
How to Create Brilliant Powder Covered Bonbons

Tiny size, big impact! Chef Jamie Caudy teaches us how to create Brilliant Powder covered chocolate bonbon molds, a perfect solution for large catering events. Check out these 5 easy steps to create miniature desserts that everyone will love!
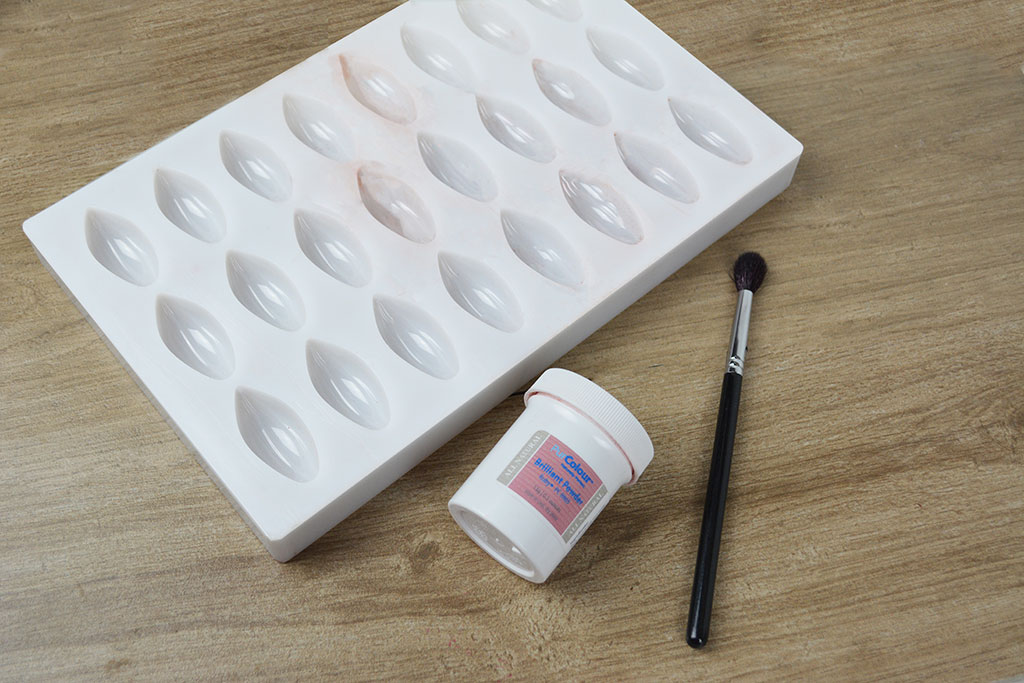
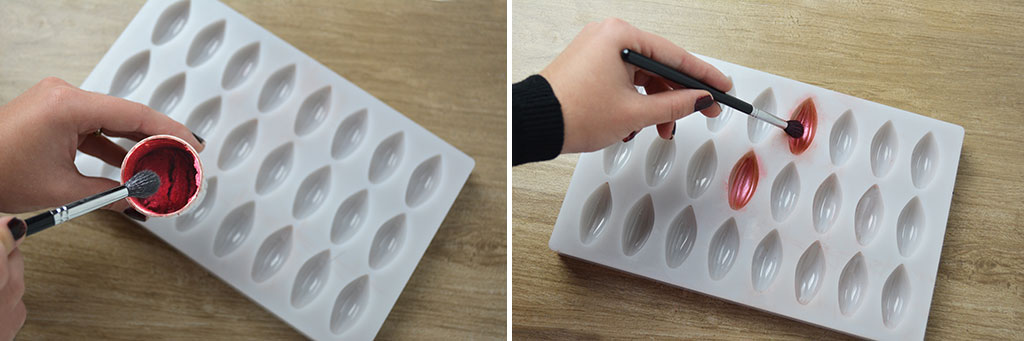
Step 1: Set Up

- Clean and polish bonbon molds with a soft cotton cloth and/or cotton balls.
- Using a food safe brush, paint each cavity with desired Brilliant Powder color, very generously.
- Once all cavities are brushed, tilt the mold to move around excess luster dust to ensure an even coating. Turn mold over onto a piece of clean parchment paper and tap out all excess dust.
- Reserve until you have all molds prepared and your chocolate is tempered and ready to fill.
Step 2: Chocolate Time!
- Temper desired chocolate according to manufacturer’s standards.
- Using a ladle, fill the mold completely to the top of each cavity. Tap all sides of the mold to allow air pockets to pop and float to the top--this will ensure there aren’t any holes on the tops of your finished bonbons.
- Flip mold over to dump chocolate back into your tempering machine – this will create a thin layer of chocolate (your bonbon shell).
- Scrape the top of your bonbon mold to remove all unnecessary chocolate and to create an edge on our bonbon shell.
- Allow mold to sit for a few minutes upside down on parchment paper so that all the chocolate doesn’t pool at the bottom of the mold. This will also ensure a stronger side to your shell.
- Flip back over and scrape chocolate once again to create a smooth bottom.
Step 3: Cool = Good to Go!
- Fill finished bonbon shells with desired ganache that is cool to the touch – if your ganache is too hot, the shells will re-melt and the beautiful temper will be ruined. Your bonbons will also not release from the mold.
Step 4: Patience...
- Allow filled shells to sit overnight or for about 4 hours.
- Temper the same type of chocolate and pour over filled mold to seal the ganache in.
- Scrape clean.
Step 5: The Homestretch!
- Once the chocolate is hardened, invert the mold onto a marble surface or onto parchment paper. Tap the mold if necessary to release the bonbons.
- If bonbons do not release place them in the cooler of freezer for a few minutes and try again.
- Store bonbons at room temperature and enjoy!
Recipe courtesy of Chef Jamie Caudy
What stunning creations have you made using our selection of PurColour Brilliant Powders? We want to see your sweet style! Tag us on social @ifiGOURMET with #GourmetSweets for a chance to get featured across our channels. Happy baking!
Leave a comment